Showing posts with label Baking and Making. Show all posts

Tuesday, February 14, 2012

Valentines Day Prep

Yesterday we kept busy doing prep work for Valentines Day (today).  That and some laundry thrown in.  We made our sugar cookie dough Sunday and put it in the fridge.  I always like to let it refrigerate over night because in my experience the cookies always bake better.  Yesterday before lunch we got busy rolling, cutting, and baking the cookies so they would have plenty of time to cool.


Once they were all baked we set them aside and had lunch.  Then it was time to get busy on those Valentines!!!


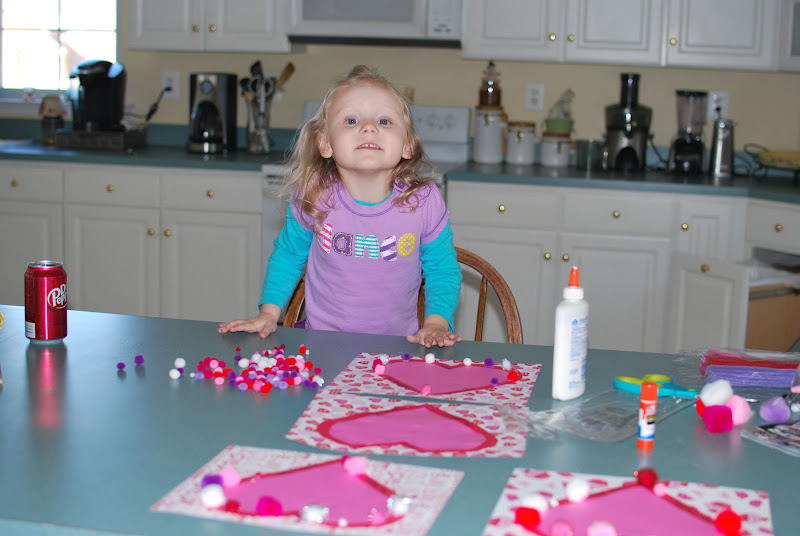
I cut out all of the paper before hand and then gave her the glue, the paper, and the decorations to make her creations.
 That's not Ava's Dr. Pepper in case anyone is wondering.  She is not allowed to have soda.
 Little hands at work

 Ready for the paint
 Can you tell she liked having her hands painted.
 They turned out so good...........love them!!!

After dinner I got the royal icing whipped up and dyed so we could get down to decorating business.


Ava put some cookies in baggies and gave them with her Valentines :)

I'll post a separate post later for the red velvet cupcakes.  We still haven't actually frosted them and I have to run and get my steaks on the grill.  Hope everyone else is having as good of a Valentines Day as we are.

Tuesday, January 24, 2012

Banana Muffins with Crumb Topping

I had three more ripe bananas waiting in the freezer to be made into something.  Banana bread takes a bit longer to cook and I was looking for something we could eat this morning.  I found this recipe in a cookbook and just made a few changes to it to suit my style :)

The ingredients....
 Lined muffin pans
 Mix together the dry ingredients in the first bowl
 Mash up the bananas in a smaller bowl
 Add the sugar, egg, and melted butter and mix.
 Add the banana mixture to the flour mixture.
 Combine together.
 Spoon into muffin pan (I always make a mess with that part.)
 In a small bowl mix the brown sugar, flour, cinnamon, oats, and butter. 
 Cut in the butter until it resembles course meal.
 Top muffins with mixture.
 Bake in a 375 degree oven for about 15 minutes. I started eying them after 10 minutes because my oven tends to cook faster than most cook times.
 Don't they look yummy
 Remove from muffin pans and let cool on wire rack for a few minutes.  Enjoy warm!!!!

Banana Muffins with Crumb Topping

  • Muffins
  •  
  • 1 1/2 cups all-purpose flour
  • 1 teaspoon baking soda
  • 1 teaspoon baking powder
  • 1/2 teaspoon salt
  • 3 ripe bananas, mashed
  • 3/4 cup white sugar
  • 1 egg, slightly beaten
  • 1/3 cup butter, melted

Crumb Topping

  • 1/3 cup packed brown sugar
  • 2 tablespoons all-purpose flour
  • 1/8 teaspoon ground cinnamon
  • 2 tablespoons butter
  • 2 tablespoons oats (next time I may add a bit more...chopped walnuts would also be good)

  1. Preheat oven to 375 degrees F. 
  2. Line muffin pans with muffin papers.
  3. In a large bowl, mix together flour, baking soda, baking powder and salt. In another bowl, mash together bananas then mix together sugar, egg and melted butter. 
  4. Stir the banana mixture into the flour mixture until just combined.  Don't over mix. Spoon batter into prepared muffin cups.
  5. In a small bowl, mix together brown sugar, flour, cinnamon, and oats. Cut in butter until mixture resembles coarse meal. Add topping over muffins.
  6. Bake in preheated oven for 15 to 20 minutes, until a toothpick inserted into the center of a muffin comes out clean (mine did shortly after ten minutes).
  7. Enjoy warm!!!


Monday, January 23, 2012

Homemade Goldfish Crackers

This week we are planning a trip to the aquarium so all of our activities, lessons, etc are based around fish :)  This was actually a really fun week to plan because I had a real theme which includes a field trip.  So to kick off the week we baked which is one of our favorite things to do together.

So what better thing to bake then one of Ava's favorite snacks............GOLDFISH!!!!

I found this recipe on pinterest and it looked easy enough plus how can you go wrong with cheese.  

To start we had to make our own cookie cutter using a soda can.  Ours wasn't perfect but Ava wasn't in a patient perfectionist mood.  In fact I'm slowly learning that stopping to take nice pretty pictures of our baking endeavors isn't so easy.  Ava will just move right on whether we are ready or not so I only really have time for quick snapshots and I have to hope they turn out.

Cut a thin strip of aluminum
 Fold into a fish shape and tape together
 The cast of characters
 Of course the always needed handy helper
 Pulse all ingredients in the food processor.  Ava liked getting to push the button.
 My food processor is small so I had to split the batch and then combine in a mixing bowl.
 Then we wrapped the dough in saran wrap and put it in the fridge to chill.

 Then I remembered we had some goldfish so I thought I'd get it out and look at the ingredients.
Baked with real cheese?!?!?!  I'd hope so.
 The ingredients aren't bad (I've seen worse things) but the list does seem long.
 Ready to roll.  We use this pampered chef pizza dough roller instead of a traditional roller because it's easier for Ava to handle.
 Cut out the fishy shapes
 Place them on a cookie sheet.  We have a blue silicone mat so when Ava was placing the fish on the mat she pretended she was putting them in the water.  At one point they were even being chased by sharks.
 Bake at 350 for about 15 minutes.
 A closer look
 They are yummy and from all the reviews I read they get even better the next day.

The recipe................I simplified it a bit from the original for a basic cheese flavor but next time I may experiment a bit with seasonings and cheese.


Goldfish Crackers
  • 1 cup flour
  • 4 tablespoons cold salted butter, cut into cubes
  • 8 ounce package grated sharp cheddar cheese
  • 3/4 teaspoons salt
  • 2T-4T cold water (add one T at a time in case you don't need it all)
Directions
  1. Pulse the flour, salt, butter, and cheese using a food processor until it is combined.
  2. Pulse in 2 to 4 tablespoons of water one tablespoon at a time.  You may not need it all.  You need just enough to be able to form the dough into a ball.
  3. Roll out and cut into shapes.  The thinner you roll it the crispier they will be. 
  4. Place on a cookie sheet lined with parchment or a silicone mat.
  5. Bake in a 350 degree oven for about 15 minutes or until they look crispy.  
**Hint--they get better the longer they rest.